IMRAN KHAN

IMRAN KHAN
IT CS

Friday 15 January 2016

What's New in IIS 8?| IIS 8


What's New in IIS 8?| IIS 8


There are great improvements and new very useful features like Server Name Indication (SNI), Centralized Certificates Store (CCS), CPU Throttling, Application Initialization, Dynamic IP Restriction, WebSockets, and finally FTP 8.

Version Notes IIS 8.0 IIS 8.0 is only available in Windows Server 2012 and Windows 8. IIS 7.5 IIS 7.0  


Server Name Indication (SNI): Using SNI we can configure thousands of secure websites on the web server, thus it allows many SSL sites to share the same Web Server IP. But we have to consider that not all browsers support SNI, for example it doesn't work on Windows XP, even IE 8.
Centralized Certificates Store (CCS): Using CCS we can configure all certificate to be stored and accessedcentrally on a file share. So in web server farm, Each IIS on separate server just go and pick up the certificate from the share but it must be certificate name like website name exactly. But we need to enable it in each web server (following concept of shared configuration). Thus Certificate Renewal and syncing tasks of certificates in the farm now is a piece of cake :)
 
CPU ThrottlingUsing CPU Throttling we can control and limit how much CPU each application pool can consume as a percentage of CPU. It is not a new feature, it was there in IIS 7.x; it was just killing w3wp when reach limit. But now it have a new additional actions like Throttle and ThrottleUnderLoad that will limit the CPU consumption for the worker processes in the application pool to the configured value. It is important to know that CPU Throttling doesn't reserve CPU but it is just limiting CPU usage.
 
Application Initialization:  Using Application Initialization Module, we can configure initialization page as initialization or warm up tasks to run before serving 1st  HTTP request; it was there in IIS 7.x before as warm-up module. But now it is built in IIS 8. 
Dynamic IP Restriction (DIPR): Using DIPR we can Customize IIS reply like: Unauthorized (HTTP 401), Forbidden (HTTP 403), Not Found (HTTP 404), or Abort (IIS terminates the HTTP connection). Moreover we can allow or deny specific IP address or a range of IP addresses, even if they violate a dynamic restriction
setting. We can block dynamic IPs based on the number of concurrent requests or  the number of requests over a period of time.  Finally it is a very useful feature for web servers behind firewall or load balancer, because of the proxy mode property that enables IIS to cross checks the values in the X-Forwarded-For HTTP header. So it can verify the IP address of the client initially made request.

Install Active Directory Users and Computers: windows 8.1

Install Active Directory Users and Computers: windows 8.1


  1. Open Control Panel
  2. Select Programs.
  3. From the Programs and Features section, select Turn Windows features on or off.
  4. Scroll down and expand the Remote Server Administration Tools section.
  5. Expand Role Administration Tools.
  6. Expand AD DS and AD LDS Tools.
  7. Ensure that AD DS Tools is checked, then click OK.


Monday 11 January 2016

Windows Deployment Services (WDS)


# DHCP SERVER SETTINGS

If WDS and DHCP Server are NOT on same machine, Use the following Setting to inform client from which server to boot.

# TFTP ERROR:

After configuring WDS, you may get following error while trying to boot from Network.
.
Solution : You have to configure boot ROM in WDS console to tell Client which boot ROM file to use.
>

Note: startrom.com & pxeboot.com Boot ROM files can found at this location
\\WDS_SERVER\RemoteInstall\Boot\x86
startrom.com is suitable if you have only legacy images on your WDS Server.
pxeboot.com is suitable if you have both legacy WinXP/ERD/Acronis and Windows 7 images configured on your WDS Server.
TIP: You can also use startrom.n12 & pxeboot.n12 If you want to directly boot to WDS skipping F12.

Howto Add Drivers in XP Image (Legacy)

First create following folder structure
\$OEM$\$1\Drivers
in your Windows XP RIS image location e.g:
\\wds_server\RemoteInstall\Setup\English\Images\WINDOWS-XP-SP3\i386\$OEM$\$1\Drivers\
Copy your network card driver here. (in drivers folder)
Now open unattended file like winnt.sif or ristndrd.sif in notepad
(Depend on your deployment structure)
e.g:
WDS_SERVER\RemoteInstall\Setup\English\Images\WINDOWS-XP-SP3\i386\templates\
Add following lines in [Unattended] section
[Unattended]
DriverSigningPolicy=Ignore
OemPreinstall=yes
OemPnpDriversPath=Drivers\Nic
Make sure there are no duplications.
Restart WDS Service.

Adding ERD COMMANDER 2007 in WDS

Simply Add Windows 2003 Standard Edition  from WDS Legacy Console,
Now Copy I386 folder from ERD folder to WDS windows 2003  image folder. If it asks for Overwrite , Select Yes.
Now  add the /minint synatx in this file
\\wds_server\RemoteInstall\Setup\English\Images\ERD\i386\templates\ristndrd.sif
[SetupData]
OsLoadOptions = “/noguiboot /fastdetect /minint”
To add driver in ERD Commander, copy your network driver in
(I don’t know the exact path, so copy it in all possible folder, some1 please point which exactly should these files be pasted in, i guess only system32 is enough)
\\wds_Server\RemoteInstall\Setup\English\Images\ERD\i386
\\wds_Server\RemoteInstall\Setup\English\Images\ERD\i386\system32
\\wds_Server\RemoteInstall\Setup\English\Images\ERD\i386\system32\drivers

Add Win7 Boot Image:

Following is an excellent guide on howto add Windows 7 Boot Image in WDS
http://www.windows-noob.com/forums/index.php?/topic/261-how-can-i-capture-an-image-using-wds/

Add Drivers in Windows 7 Boot Image:

First copy boot.wim from windows 7 CD to your desktop.
Now we have to mount this image in any temporarily directory,
Then add drivers, then commit change,
Now dismount this image,
Now copy it to any folder in WDS server,
From wds console, replace current boot image with this new image. The traditional way is to use theDISM tool provided with your win7/vista, but the easiest way to do is to use 3rd party GUI tool (Free edition).
Download DISM GUI tool from
Mr Jinje DISM Tool™
http://www.msfn.org/board/topic/138804-mr-jinje-dism-tool/
Now first copy the boot.wim from the wds server or from the windows 7 dvd from \sources\ folder.
Now open the Jinje DISM Tool, Click on MOUNT WIM, select boot.wim , and mount it in any temp folder, e.g: c:\wds_temp_mount_dir
Now Click ADD DRIVERS, point it to folder where your windows 7 drivers are located. It will auto add it toboot.wim.
Now Click on COMMIT WIM, it will write changes to this boot.wim
Now click on DIS-MOUNT WIM.
Copy this updated boot.wim to wds temporarily directory.
From WDS Console, replace current boot image with your newly updated image you copied in temp folder of wds.

.

Final ~ Screenshots :) 
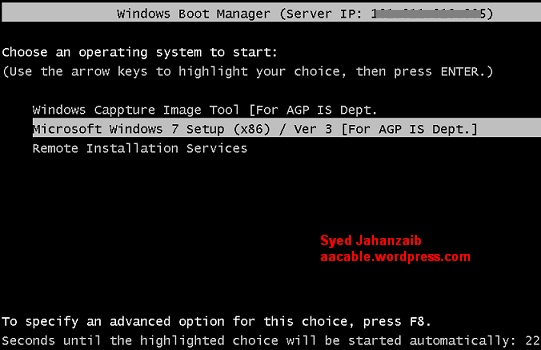
<WDS running in Mixed Mode>

.